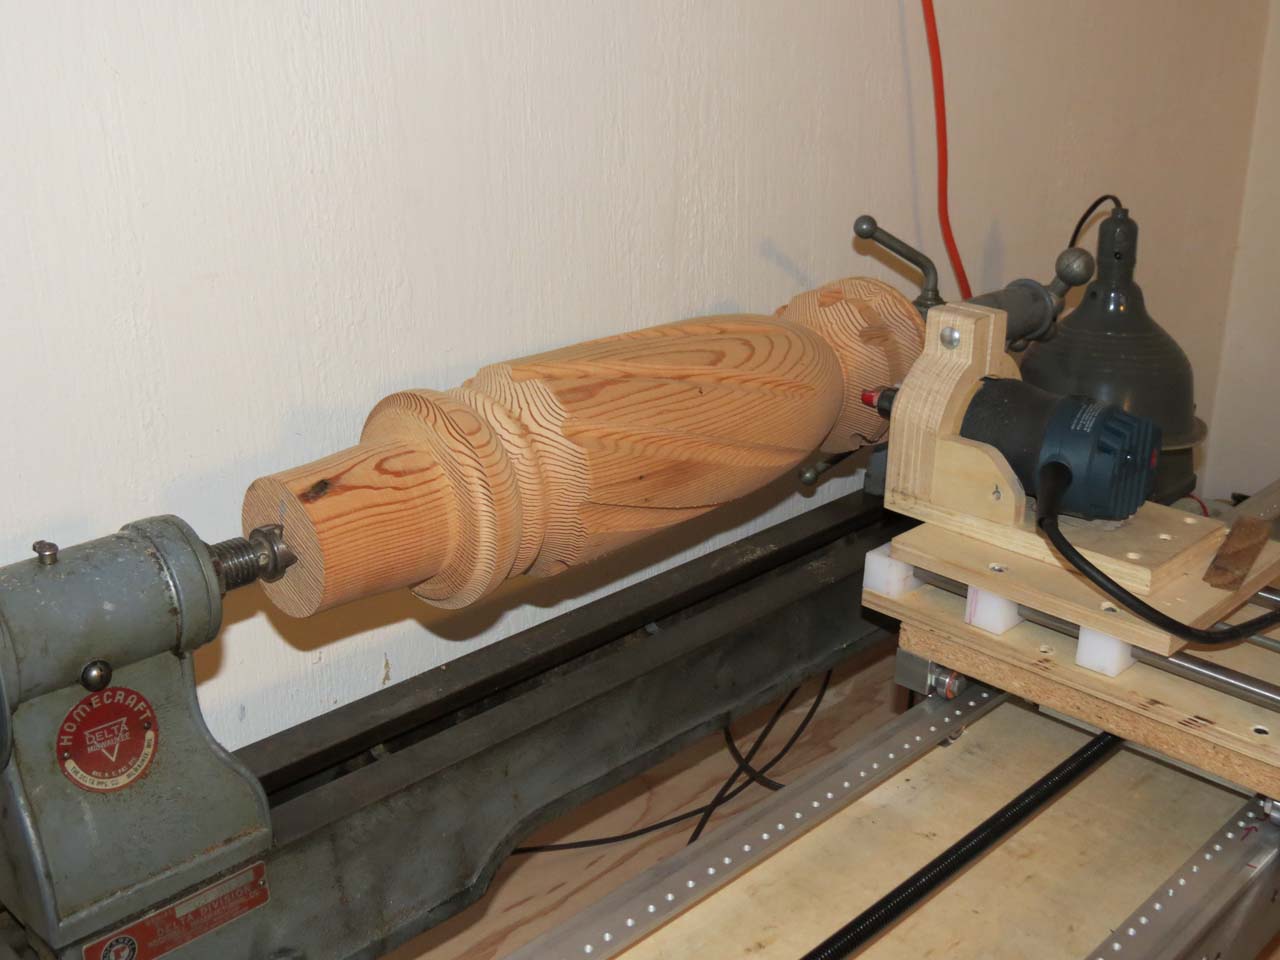
cutting flutes on a big spindle (5" dia, 22" long)
First "real" parts -- the big bolt was fun, but just a test, and a bit of a joke. This is the first "real" part -- a base for a round table (I think). I turned the spindle by hand on the manual wood lathe, and modified the thread code to cut a series of flutes. It worked pretty well, in spite of a couple of errors in the code:
1. I intended to climb cut (feed with the cutter so the bit pulls with the direction of travel. Makes a cleaner cut across grain). This code runs the cutter against the direction of travel (conventional cut), which is more prone to splitting when cutting across the grain.
2. I rotate the part by one degree between the forward and reverse cut in order to make a slightly wider cut. But I didn't account for that when spinning between flutes, so each cut advances one degree around the spindle. I actually like the way it looks, so I didn't fix it, but it was a (happy) mistake.
bottom of x-axis carriage showing new nut and diy tap
Upgraded lead screw. The screw that originally drove the x-axis was a standard hardware store 1/2" x 13 threads per inch rod. It had the advantage of being cheap, easy to work with and with standard threads, easy to connect to. The disadvantage was that it was inaccurate, not straight, and really slow: it took 13 revolutions to travel one inch. I upgraded to an acme lead screw with 5 threads per inch, 2 starts. This gives me faster travel at lower motor RPMs, where they have more torque. It also speeds up the rapid traverse -- it no longer takes a full minute to return the carriage to zero.
The screw was pretty expensive so I just couldn't bring myself to spend another $40 on a nut, and decided to make my own out of UHMW. It only took about 5-6 hours to come up with one that worked... (how cheap do I work? You do the math)
First, I tried to heat form the nut but wasn't happy with the results, so I decided to make a tap and cut the treads instead. I ground a couple of grooves in a length of the acme rod, tapered the ends, made sure that all the thread starts were sharp. Next, a hole was drilled in the UHMW blank a few thou over the thread minor diameter and it was chucked in the metal lathe. With the home brew tap in a chuck in the tail stock, I started the threads by hand. After a few turns, it bound up and started to spin, so I took it out and finished with a vise and a pair of channel lock pliers. That actually worked well because I was able to flex the nut and squeeze the sides in, making the cut deeper. By the time I had gripped the nut by all sides to turn it, it had cut enough clearance to spin fairly freely. Then, I ran the tap back and forth through the nut with a hand drill a few dozen times until it was running smooth. A little teflon lube and it's running smooth with with very little resistance and almost zero backlash.
A couple of observations:
UHMW has a nasty habit of flexing away from the cutter and springing back, so your cuts and holes tend to be undersize.
This approach worked on UHMW because the stuff is so soft and easy to cut. It might work on acetyl, nylon or acrylic, but I doubt it would work so well. My "tap" was very crude -- I think you'd need to make something much more refined to cut a more rigid material.
I left the burr on the cutting edge, so when I was running it back and forth with the drill, it was shredding off a little bit of material with each cut. It did not leave a clean cut, but it helped to overcome UHMW's tendency to cut undersize -- each time through, it removed a little more material.