Showing posts with label cutter. Show all posts

Sunday, May 5, 2013

Router lathe -- converted to CNC


A lot has happened on the router lathe and this posting is way overdue. It's gained a nice new 3rd axis carriage driven by a stepper motor, adding programmable z-axis (depth of cut) control,  and has been converted from arduino control to full CNC, controlled by a PC running Mach3. Here's a video of the first major part cut on the machine since the rebuild.


The conversion to a CNC controller opens up huge potential. The arduino was great for spirals, but it took a lot of code to generate them. I found I could do in 3 0r 4 lines of g code what took 100+ lines of arduino code.  I could have installed Grbl and continued using the arduino as the CNC controller, but I like the feedback graphical programs like Mach3 and EMC2 provide. Although I do have an idea for a little internal thread-cutting machine that Grbl might be perfect for.

Cutting the square profile proved to be a bit of a challenge. Unfortunately, on this machine there's no way to move the cutter relative to the center line of the part (bad planning!), so cutting a flat is a little more complicated. After a calling up some forgotten math and doing some sloppy Excel scripting, I was able to make a spreadsheet to generate code to control depth of cut / rotation ratio that generates a flat surface as the part rotates. Then, rotating the part by increments between each cut to produce the spiral was a matter of learning how to use parameters and subroutines in g code to create loops

Here's the Excel function to make the square:  
=((Offset/COS(angle))+(tool_radius/COS(angle)))-tool_radius
...where offset is the distance from the center of the part to the flat surface you want to generate, angle is the angle relative to the axis of the cutter and tool_radius is... well tool radius. I have a spreadsheet that does all the math and generates g code for different angles and offsets. I'd be happy to share if anyone's interested, but I don't want to post it in its current unfinished state.

Wednesday, July 4, 2012

Router lathe: making real parts


cutting flutes on a big spindle (5" dia, 22" long)

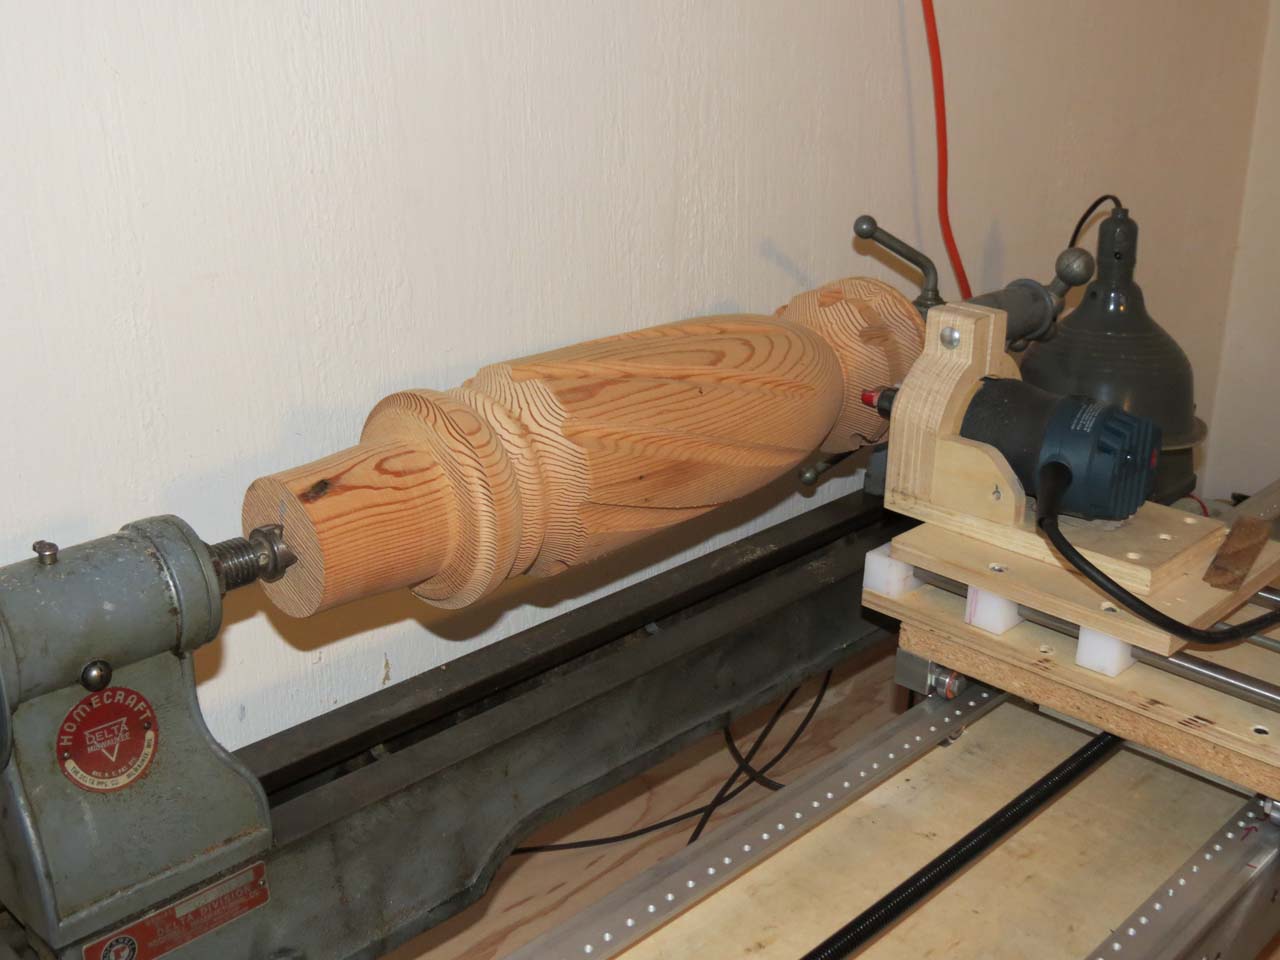
 First "real" parts -- the big bolt was fun, but just a test, and a bit of a joke. This is the first "real" part -- a base for a round table (I think). I turned the spindle by hand on the manual wood lathe, and modified the thread code to cut a series of flutes. It worked pretty well, in spite of a couple of errors in the code:

1. I intended to climb cut (feed with the cutter so the bit pulls with the direction of travel. Makes a cleaner cut across grain). This code runs the cutter against the direction of travel (conventional cut), which is more prone to splitting when cutting across the grain.

2. I rotate the part by one degree between the forward and reverse cut in order to make a slightly wider cut. But I didn't account for that when spinning between flutes, so each cut advances one degree around the spindle. I actually like the way it looks, so I didn't fix it, but it was a (happy) mistake.


< New lead screw  CNC conversion >

Router lathe: New leadscrew

bottom of x-axis carriage showing new nut and diy tap
Upgraded lead screw. The screw that originally drove the x-axis was a standard hardware store 1/2" x 13 threads per inch rod. It had the advantage of being cheap, easy to work with and with standard threads, easy to connect to. The disadvantage was that it was inaccurate, not straight, and really slow: it took 13 revolutions to travel one inch. I upgraded to an acme lead screw with 5 threads per inch, 2 starts. This gives me faster travel at lower motor RPMs, where they have more torque. It also speeds up the rapid traverse -- it no longer takes a full minute to return the carriage to zero.

The screw was pretty expensive so I just couldn't bring myself to spend another $40 on a nut, and decided to make my own out of UHMW. It only took about 5-6 hours to come up with one that worked... (how cheap do I work? You do the math)

First, I tried to heat form the nut but wasn't happy with the results, so I decided to make a tap and cut the treads instead. I ground a couple of grooves in a length of the acme rod, tapered the ends, made sure that all the thread starts were sharp. Next, a hole was drilled in the UHMW blank a few thou over the thread minor diameter and it was chucked in the metal lathe. With the home brew tap in a chuck in the tail stock, I started the threads by hand. After a few turns, it bound up and started to spin, so I took it out and finished with a vise and a pair of channel lock pliers. That actually worked well because I was able to flex the nut and squeeze the sides in, making the cut deeper. By the time I had gripped the nut by all sides to turn it, it had cut enough clearance to spin fairly freely. Then, I ran the tap back and forth through the nut with  a hand drill a few dozen times until it was running smooth. A little teflon lube and it's running smooth with with very little resistance and almost zero backlash.

A couple of observations:

UHMW has a nasty habit of flexing away from the cutter and springing back, so your cuts and holes tend to be undersize.

This approach worked on UHMW because the stuff is so soft and easy to cut. It might work on acetyl, nylon or acrylic, but I doubt it would work so well. My "tap" was very crude -- I think you'd need to make something much more refined to cut a more rigid material.

I left the burr on the cutting edge, so when I was running it back and forth with the drill, it was shredding off a little bit of material with each cut. It did not leave a clean cut, but it helped to overcome UHMW's tendency to cut undersize -- each time through, it removed a little more material.


Sunday, June 10, 2012

Router Lathe: Internal threads


Internal bore cutting spindle
I always knew that the big challenge would be cutting internal threads. What cutter? How much extension? Speed? How to manage chatter and deflection? The criteria was that I wanted to cut threads a half inch deep, at least 3 inches into a bore. For this I needed a 60 degree side cutting bit that I could extend 3 inches past the end of the router. Good luck finding that router bit…

My solution was to create an offset spindle with a half-inch shaft that holds a fly cutter. The spindle is made up of a couple of bearings and a .515" ground stainless steel shaft, turned down to a half inch on the ends to fit the bearings. The spindle frame and router clamp is made of birch ply. The spindle is hinged so it can be swung free to check the fit of the bore. The spindle is driven by a vacuum cleaner belt off the router with a 4:1 speed reduction. I bought a cheap Harbor Fright trim router to run it, just in case this is hard on router bearings. (better to trash a $30 tool than a $130 tool). I also got one of their router speed controls to slow it down. (I seem to be buying a lot of cra stuff from those guys lately)

speed control


spindle
.


 In order to keep the rotating weight down, I used 1/4" drill rod for the fly cutter, inserted at an angle through the mandrel, and ground so that each end only cuts one side of the thread groove.

cutter layout
 Grinding the tool bit on my other wood lathe. It was actually much easier than expected to get the angles and correct extension on the cutter. The only problem was the drill rod I was using turned out to be stainless, not heat-treatable tool steel. It holds an edge - kinda. 

Grinding the cutter.
To grind the cutter, I slowly spun the lathe spindle by hand while cranking the cross-feed vise back and forth. The cross-feed vise is set at 30 degrees to the cutter. It took a different setup for each end of the cutter. This fixture only ground the angle. All back relief and rake on the cutter were ground by hand & eyeball.


You can hear the harmonic vibration from the stretchy belt, right before the cutter exits the end of the bore. This is a problem I'll have to confront before I can increase depth of cut and cutting speed.

Here's a better video made after the outside of the nut was formed.


Lessons learned:
  1. Needs mass. There's a fair amount of vibration that would probably be dampened by more mass in the router carriage and spindle. I was planning to rebuild anyway after this initial test, I'll just beef things up a bit more.
  2. Stretchy belt -- not so good. I'm getting a significant harmonic vibration, especially when cutting across end-grain that I think comes from belt stretch. (you can hear it in the video, right before the cutter exits the end of the bore) I can dampen it somewhat by putting my finger on the belt. I'll look into a better drive belt to replace the $2.99 Hoover belt I used. More mass in the router carriage may help this as well.
  3. Cutter needs rake. I just ground a flat cutting face on these cutters, so there's zero rake on the cutting edge. I think if they had a little rake ground in they would cut better -- slice the wood rather than scrape.